Palette API로 색상 선택 | Android 개발자 | Android Developers
팔레트 라이브러리는 이미지에서 중요한 색상을 추출하여 시각적으로 매력적인 앱을 만드는 데 도움이 되는 지원 라이브러리입니다.
developer.android.com
이미지 뷰에 들어갈 이미지에서 대표 색을 추출한 후에 이미지 타이틀(텍스트)에 그 색을 입혀서 사용할 방법을 찾다가 palette 를 알게 되었습니다.
먼저 build.gradle에 요걸 추가해줍니다.
implementation 'com.android.support:palette-v7:28.0.0'
다음은 이미지와 텍스트를 레이아웃에 넣어서 배치해줍니다.
<?xml version="1.0" encoding="utf-8"?>
<LinearLayout xmlns:android="http://schemas.android.com/apk/res/android"
    xmlns:app="http://schemas.android.com/apk/res-auto"
    xmlns:tools="http://schemas.android.com/tools"
    android:layout_width="match_parent"
    android:layout_height="match_parent"
    android:orientation="vertical"
    tools:context=".MainActivity">

    <FrameLayout
        android:layout_weight="1"
        android:layout_width="match_parent"
        android:layout_height="0dp">

        <ImageView
            android:id="@+id/imageview1"
            android:src="@drawable/best1"
            android:scaleType="centerCrop"
            android:layout_width="match_parent"
            android:layout_height="match_parent" />
        <TextView
            android:id="@+id/text1"
            android:text="아메리카노"
            android:layout_marginTop="20dp"
            android:layout_marginLeft="20dp"
            android:textSize="20dp"
            android:layout_width="wrap_content"
            android:layout_height="wrap_content" />

    </FrameLayout>


    <FrameLayout
        android:layout_weight="1"
        android:layout_width="match_parent"
        android:layout_height="0dp">

        <ImageView
            android:id="@+id/imageview2"
            android:src="@drawable/best2"
            android:scaleType="centerCrop"
            android:layout_width="match_parent"
            android:layout_height="match_parent" />
        <TextView
            android:id="@+id/text2"
            android:text="블루베리 베이글"
            android:layout_marginTop="20dp"
            android:layout_marginLeft="20dp"
            android:textSize="20dp"
            android:layout_width="wrap_content"
            android:layout_height="wrap_content" />

    </FrameLayout>

    <FrameLayout
        android:layout_weight="1"
        android:layout_width="match_parent"
        android:layout_height="0dp">

        <ImageView
            android:id="@+id/imageview3"
            android:src="@drawable/best3"
            android:scaleType="centerCrop"
            android:layout_width="match_parent"
            android:layout_height="match_parent" />
        <TextView
            android:id="@+id/text3"
            android:text="녹차 머핀"
            android:layout_marginTop="20dp"
            android:layout_marginLeft="20dp"
            android:textSize="20dp"
            android:layout_width="wrap_content"
            android:layout_height="wrap_content" />

    </FrameLayout>

    <FrameLayout
        android:layout_weight="1"
        android:layout_width="match_parent"
        android:layout_height="0dp">

        <ImageView
            android:id="@+id/imageview4"
            android:src="@drawable/best4"
            android:scaleType="centerCrop"
            android:layout_width="match_parent"
            android:layout_height="match_parent" />
        <TextView
            android:id="@+id/text4"
            android:text="아이스 꿀단지"
            android:layout_marginTop="20dp"
            android:layout_marginLeft="20dp"
            android:textSize="20dp"
            android:layout_width="wrap_content"
            android:layout_height="wrap_content" />

    </FrameLayout>


</LinearLayout>
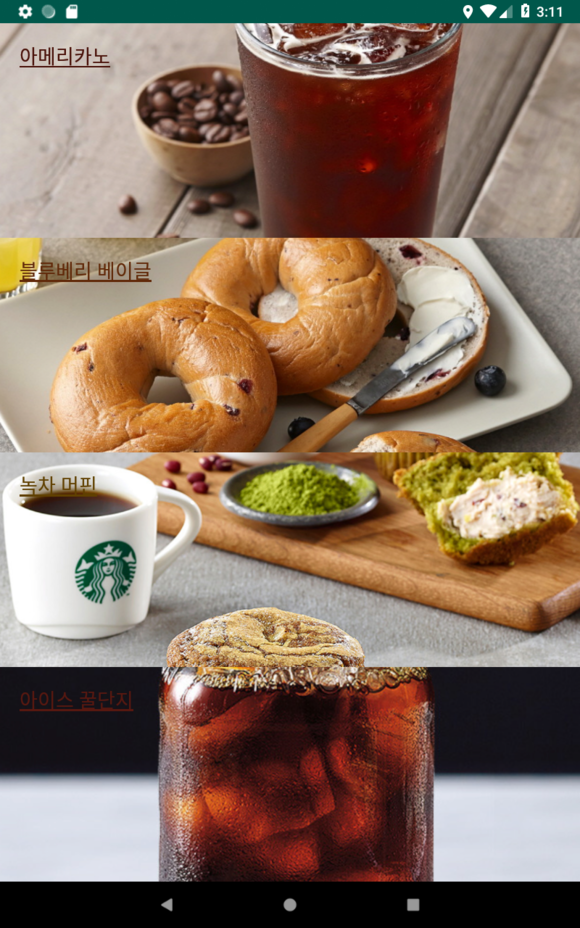
대충 요런상태가 됩니다.
그다음 자바 코드를짜봅시다.
text[0] = (TextView)findViewById(R.id.text1);
        text[1] = (TextView)findViewById(R.id.text2);
        text[2] = (TextView)findViewById(R.id.text3);
        text[3] = (TextView)findViewById(R.id.text4);

        image[0] = (ImageView)findViewById(R.id.imageview1);
        image[1] = (ImageView)findViewById(R.id.imageview2);
        image[2] = (ImageView)findViewById(R.id.imageview3);
        image[3] = (ImageView)findViewById(R.id.imageview4);
id 값을 이용해서 우선 필요 객체들을 생성해줍니다.
그 다음은 스레드를 따로 만들어서 그 안에서 palette와 관련된 작업을 진행하여 줍니다.(해당 코드는 첫번째 이미지에대해서만 처리하였습니다 다른 이미지들도 처리해주면 됩니다.)
 Thread thread = new Thread(new Runnable() {//main스레드에서 돌리면 null값만 나옴. 반드시 따로 스레드 생성
            @Override
            public void run() {

                    Drawable d = image[0].getDrawable();
                    Bitmap bitmap = ((BitmapDrawable)d).getBitmap();//bitmap추출

                    Palette.from(bitmap).generate(new Palette.PaletteAsyncListener() {
                        @Override
                        public void onGenerated(Palette palette) {

                            if(palette==null)
                                return;

                            Palette.Swatch vibrantSwatch = palette.getDarkVibrantSwatch();//원하는 색깔 성향으로 swatch 생성
                            if(vibrantSwatch!=null)
                            {
                                int color = vibrantSwatch.getRgb();//swatch에서 대표색 추출
                                text[0].setTextColor(color);//text색깔 설정
                                text[0].setAlpha(1);//투명도 설정
                            }
                            text[0].setPaintFlags(text[0].getPaintFlags() | Paint.UNDERLINE_TEXT_FLAG);//밑줄긋기

                        }

                        });
                    }


            });

thread.start();- thread 생성
- 이미지 파일에서 bitmap 추출
- bitmap에서 palette 생성
- palette에서 swatch 추출 (제일 많이 사용되는 종류가 getDarkVibrantSwatch() )
- swatch에서 getRgb, getTitleTextColor, getBodyTextColor를 이용하여 대표색 추출
- getTitleTextColor는 제목, getBodyTextColor는 본문에 어울리는 색
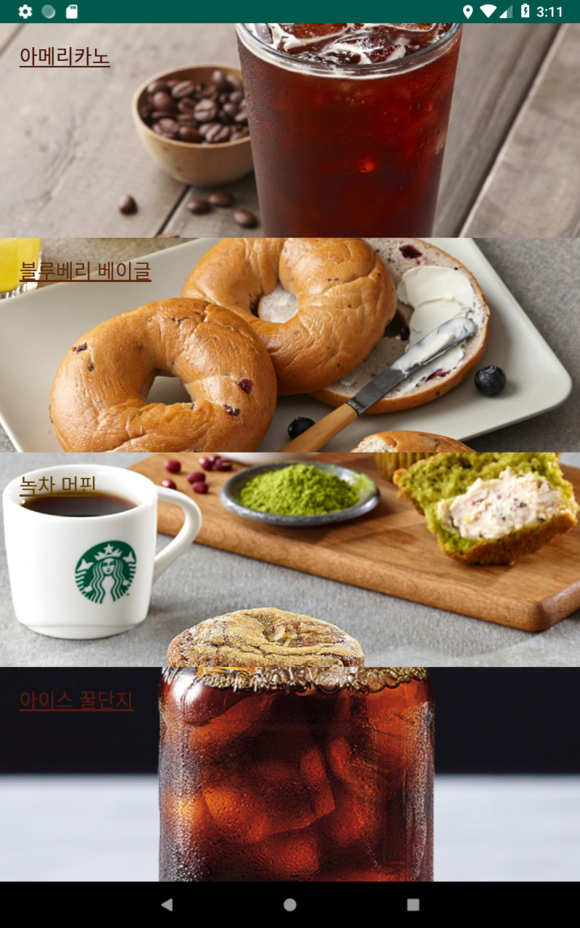
위에 코드인 getRgb를 적용했을 때의 결과입니다.

보시다시피 마지막 글자는 배경과 텍스트 색이 둘다 어두워서 잘보이지가 않습니다.
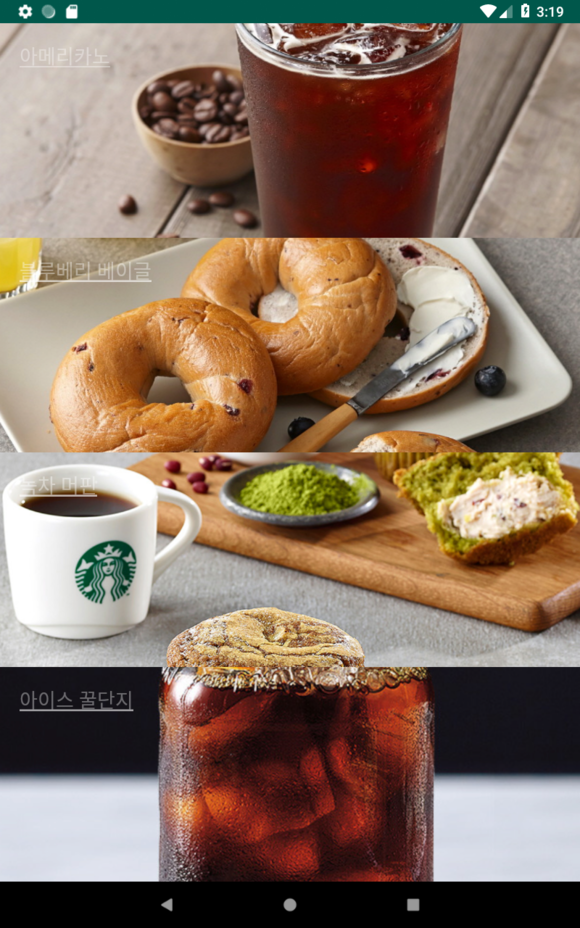
이번엔 getTitleTextColor와 getBodyTextColor로 뽑아봅니다.

titleTextColor랑 bodyTextColor는 이상하게 결과가 똑같이 나오더라고요...원래 안그런데..
어찌됐든 getRgb를 사용하기로 합니다만 색깔이 너무 어둡거나 배경색과 텍스트 색이 겹치게 되면 잘 안보여서 채도와 명도를 올려보기로 합니다.
Thread thread = new Thread(new Runnable() {//main스레드에서 돌리면 null값만 나옴. 반드시 따로 스레드 생성
            @Override
            public void run() {

                    Drawable d = image[0].getDrawable();
                    Bitmap bitmap = ((BitmapDrawable)d).getBitmap();//bitmap추출

                    Palette.from(bitmap).generate(new Palette.PaletteAsyncListener() {
                        @Override
                        public void onGenerated(Palette palette) {

                            if(palette==null)
                                return;

                            Palette.Swatch vibrantSwatch = palette.getDarkVibrantSwatch();//원하는 색깔 성향으로 swatch 생성
                            if(vibrantSwatch!=null)
                            {
                                //채도 명도 조절
                                float[] hsv_value = new float[3];
                                Color.RGBToHSV(Color.red(vibrantSwatch.getRgb()), Color.green(vibrantSwatch.getRgb()), Color.blue(vibrantSwatch.getRgb()), hsv_value);
                                hsv_value[2] += 0.5;//명도
                                hsv_value[1] += 0.4;//채도
                                int color = Color.HSVToColor(hsv_value);
                                text[0].setTextColor(color);//text색깔 설정
                                text[0].setAlpha(1);//투명도 설정
                            }
                            text[0].setPaintFlags(text[0].getPaintFlags() | Paint.UNDERLINE_TEXT_FLAG);//밑줄긋기

                        }

                        });
                    }


            });

            thread.start();
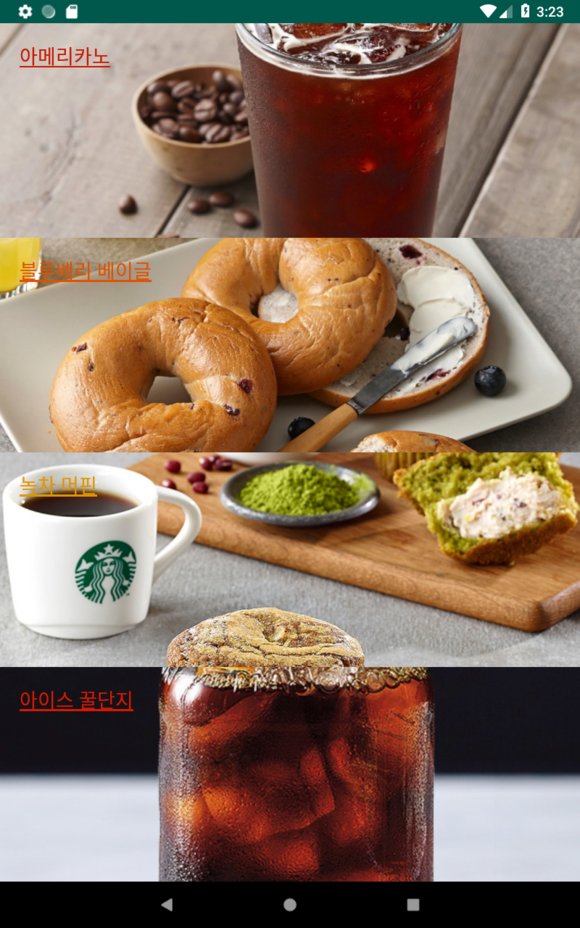
수정된 코드 적용


오른쪽이 채도 명도 적용한 후 입니다. 마지막 사진은 확실히 선명히 보이긴 하는데....오히려 밝은 색 사진들은 그대로네요...
결국 완전히 잘보이게 하는건 무리가 있는 듯 합니다. 아니면 textview가 있는 곳 위치의 배경색을 읽어서 채도 명도를 상대적으로 조절하던지 하는 방법을 써야 될 듯하네요,
'Android' 카테고리의 다른 글
| [안드로이드] View와 ViewGroup (0) | 2020.09.08 |
|---|---|
| [안드로이드] layout 종류 (0) | 2020.09.08 |
| [안드로이드] MVVM 패턴 LiveData + ViewModel + DataBinding 예제 (3) | 2020.09.02 |
| [안드로이드] RecyclerView에 itemClickListener (0) | 2020.08.23 |
| [안드로이드] RecyclerView (0) | 2020.08.23 |


댓글